Termix: A Free, Self-Hosted Termius Alternative Built on Plugins
Termix is a free, Apache-2.0 licensed web app for SSH, SFTP, remote desktop and Docker management. Here is what it does and how to self-host it with Docker Compose.
If you manage more than a handful of servers, you know the routine: one terminal tab per host, an SSH config file that keeps growing, a separate tool for SFTP, another one for RDP, and a password manager that holds the keys to all of it. Termix wants to pull all of that into a single web app that you host yourself. It's currently one of the fastest-moving projects in the self-hosting space, and its brand-new plugin system makes it worth a closer look.
The project describes itself as "a free, self-hosted Termius". That's a good starting point, but after reading through the docs and release notes, it's actually broader than that: Termix is turning into a small server management platform, with SSH at the core and almost everything else as optional plugins.
What is Termix?
Termix is an open-source server management platform you run on your own hardware. It lives on GitHub at Termix-SSH/Termix, is written in TypeScript and is licensed under the Apache License 2.0. At the time of writing (October 22, 2026), the repository has around 15,600 stars and the latest stable release is v26.10.4, published on October 21, 2026.
The interesting part is the architecture. Since v26.10.0 (released October 10, 2026), the Termix core only handles a few things:
- Hosts: saved in nested folders, with tags, bulk editing, import/export and Quick Connect for one-off sessions.
- Credentials: passwords and keys you can reuse across hosts, with defaults per server, user or folder.
- Sharing and roles: share hosts, credentials and folders with users or roles at four levels (connect, view, edit, manage).
- Accounts and security: local accounts, visible and revocable sessions, trusted devices, API keys and an audit log. Secrets are encrypted per user, and the SQLite database is encrypted on disk by default.
Everything else, including the SSH terminal itself, is a plugin you can switch on, off or remove entirely.
It runs in the browser (with PWA support), and there are desktop apps for Windows, macOS and Linux plus mobile apps for iOS and Android that sign in to your Termix server.
Key features (via plugins)
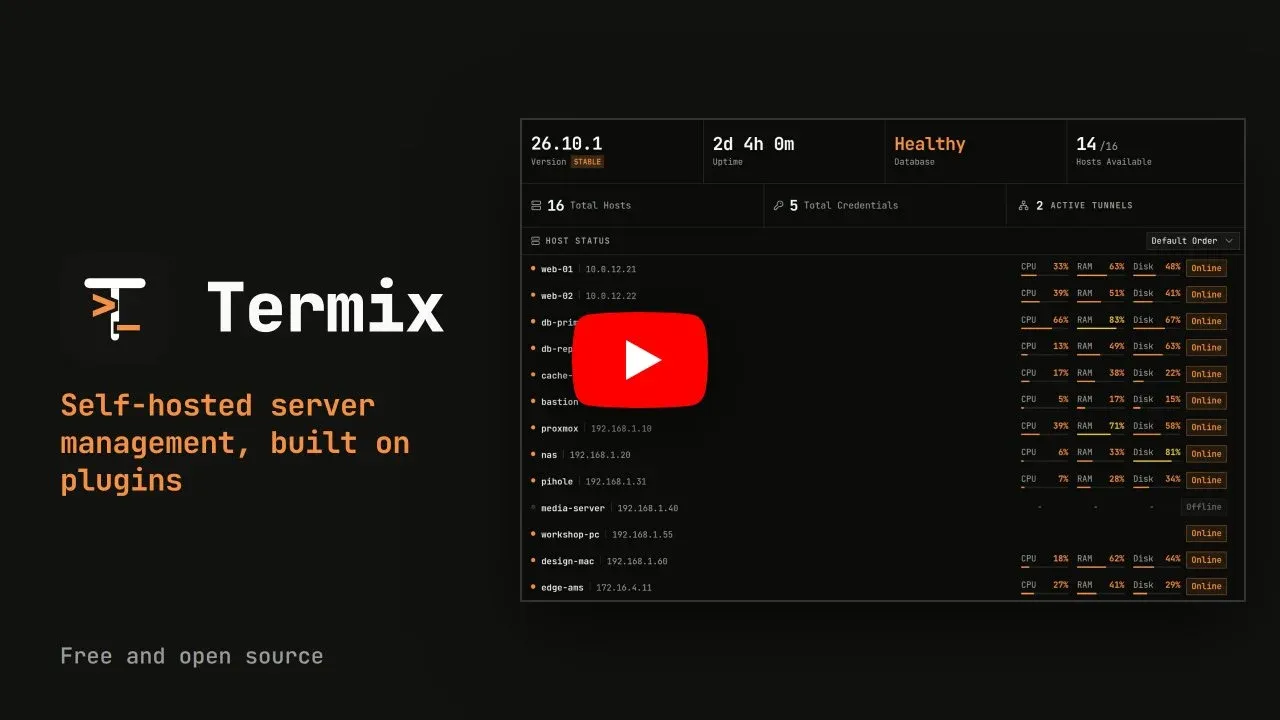
The official plugins ship with the Docker image, and you pick which ones you want during the first run. A selection of what's available, according to the README:
- SSH Terminal: tabs, split screen, history and macros.
- File Manager: browse, edit and move files over SFTP, including server-to-server transfers.
- Remote Desktop: RDP, VNC and Telnet in the browser, with clipboard, file transfer and recording.
- Docker: manage Docker and Podman containers on your hosts over SSH, with logs, stats and a console.
- Host Metrics and Host Status: live CPU, memory, disk, network and GPU stats, plus an online/offline indicator.
- Tunnels: SSH port forwarding that reconnects on its own.
- Proxmox and Tailscale: import Proxmox VE guests or tailnet devices as hosts and keep them in sync.
- Security plugins: TOTP, Passkeys, Single sign-on (OpenID Connect, GitHub, Google), LDAP, and Login Security for idle timeouts and enforced second factors.
- Short-lived SSH certificates: integrations for HashiCorp Vault, smallstep step-ca and OPKSSH.
- Session Recording and Session Sharing: record terminal and desktop sessions, or share a live session by link.
- Snippets, Fleets and Automations: run saved commands on many hosts at once or on a schedule.
The README currently lists 49 official plugins, and there's a plugin SDK and a community registry if you want to build or install third-party ones.
Why would you use it?
- One place for all your servers. Instead of juggling an SSH client, an SFTP client and a VNC viewer, you get one interface that works from any browser.
- Self-hosted and free. The project states there are no paid plans; development is funded by donations and sponsors.
- Teams and families. Role-based sharing means you can give someone "connect only" access to a host without handing over the actual key.
- Only what you need. The plugin model keeps the interface small. If you only want SSH and SFTP, you can remove the rest.
- Light on resources. The docs say an idle instance uses about 190 MB of RAM, and 1 CPU core with 1 GB of RAM is enough for up to 1,000 hosts. Add a core and 1 GB if you use remote desktop a lot.
How to install Termix with Docker Compose
The Docker image contains the web UI, the server and every official plugin. It's available for linux/amd64 and linux/arm64 from GitHub Container Registry (ghcr.io/termix-ssh/termix) and Docker Hub (termixssh/termix).
Step 1: Create a project folder
mkdir -p ~/docker/termix && cd ~/docker/termix
Step 2: Create the compose file
This is the official example from the docs. I've pinned the version tag instead of using latest, so updates only happen when you decide:
services:
  termix:
    image: ghcr.io/termix-ssh/termix:26.10.4
    container_name: termix
    restart: unless-stopped
    ports:
      - "8080:8080"
    volumes:
      - termix-data:/app/data
    environment:
      PORT: "8080"

volumes:
  termix-data:
Everything Termix stores lives in /app/data: the database, the encryption keys, plugins, uploads and recordings. Don't lose that volume, or you lose your hosts and credentials with it.
If you prefer a bind mount over a named volume, make sure the folder is owned by the user the container runs as and set PUID and PGID accordingly (both default to 1000):
    environment:
      PORT: "8080"
      PUID: "1000"
      PGID: "1000"
    volumes:
      - ./termix-data:/app/data
Step 3: Start it
docker compose up -d
Step 4: First run
Open http://your-server:8080 in your browser. The first account you create becomes the admin, so do this right away and pick a strong password. A short setup wizard then lets you choose which plugins to keep on, off or remove, how much the UI should show (Simple, Balanced or Advanced), and your theme and language. Then go to Manage, press + and add your first host.
Putting Termix behind a reverse proxy
Termix holds the keys to your servers, so don't expose plain HTTP to the internet. The docs list three requirements for any reverse proxy: WebSockets (terminals and remote desktop use them), long timeouts (an idle terminal can sit open for hours) and no upload size limit (for the file manager).
With Caddy, that's as simple as:
termix.example.com {
    reverse_proxy 127.0.0.1:8080
}
If you use Traefik, the docs provide these labels. In that case you can also drop the ports: section, as long as Termix and Traefik share a Docker network:
services:
  termix:
    labels:
      - traefik.enable=true
      - traefik.http.routers.termix.rule=Host(`termix.example.com`)
      - traefik.http.routers.termix.entrypoints=websecure
      - traefik.http.routers.termix.tls.certresolver=letsencrypt
      - traefik.http.services.termix.loadbalancer.server.port=8080
Behind a proxy, Termix sees the proxy's IP for every request. To get real client IPs in the audit log and rate limiting, set TRUSTED_PROXIES to your proxy's IP or network, and only list proxies you control:
    environment:
      TRUSTED_PROXIES: "172.16.0.0/12"
If you use single sign-on and the callback URLs come out as http://, make sure your proxy sends X-Forwarded-Proto, or set EXTERNAL_FORCE_HTTPS=true.
Configuration tips
- Turn off open registration. If you create accounts yourself, disable Allow User Registration in Settings > General, or set
ALLOW_REGISTRATION=false. - Add a second factor. Enable the TOTP or Passkeys plugin, and consider the Login Security plugin to enforce it.
- Use PostgreSQL or MySQL if you want. SQLite is the default, but
DATABASE_DIALECTandDATABASE_URLlet you switch. - Keep secrets outside the volume. Termix generates its secrets (
JWT_SECRET,DATABASE_KEY,ENCRYPTION_KEY,INTERNAL_AUTH_TOKEN) on first boot and stores them in/app/data/.env. You can supply them yourself, including as_FILEvariants for Docker secrets, andTERMIX_REQUIRE_EXTERNAL_SECRETS=truemakes Termix refuse to start unless they come from outside. - Review the plugin list. There's a Usage Statistics plugin that sends a small anonymous daily report to the developers. Decide during setup whether you want it on.
Backups and updates
The safest backup, according to the docs, is to stop the container and archive the whole data volume:
docker compose stop termix
docker run --rm -v termix-data:/data -v "$PWD":/backup alpine \
  tar czf /backup/termix-$(date +%F).tgz -C /data .
docker compose start termix
Note that Compose usually prefixes named volumes with the project name (for example termix_termix-data), so check docker volume ls for the exact name. And treat this archive like a password vault: it contains the keys that decrypt your stored passwords and SSH keys.
To update, back up first, change the pinned tag, then:
docker compose pull
docker compose up -d
Plugins update separately from the core. Admins handle them in the Plugins tab, where you can update, pin or enable auto-update per plugin. An update that asks for new capabilities waits for your review.
Things to keep in mind
- It's moving fast. The plugin architecture only arrived on October 10, 2026, and there were four point releases in the following eleven days. Expect changes, and pin your image version.
- Upgrading from older versions needs a stop in between. If you're on 2.8 or older, the docs say you have to update to 2.9, start it once and sign in before moving to 26.10.
- It's a high-value target. A web app that holds credentials for all your servers deserves extra care: HTTPS, 2FA, no open registration, and ideally access only via VPN or an authenticating proxy.
- Self-hosting the manager on the network it manages has a catch. The README itself points out that if Termix runs on the network it manages, an outage takes it down right when you need it.
How does it compare?
Termix positions itself against Termius, a commercial SSH client with cloud sync. The main difference is ownership: with Termix, your hosts and keys stay on a server you control. If you mainly need browser-based remote desktop, Apache Guacamole has been the classic self-hosted answer for years. Termix covers RDP, VNC and Telnet too, but adds SSH-focused host management, SFTP, Docker and metrics on top.
If you're looking for a dashboard rather than a server management tool, have a look at our article on Homepage, the YAML-configured homelab dashboard. And for more projects that are trending this month, check out Open Source Trends in October 2026.
Conclusion
Termix is one of the most ambitious self-hosted tools I've looked at in a while. The core is deliberately small, the plugin list is long, and the Docker setup takes just a few minutes. It's a great fit if you manage a homelab or a small fleet and want SSH, SFTP, remote desktop and container management in one place you own.
The flip side is the pace of change and the sensitivity of what it stores. Pin your version, back up /app/data, lock down access, and you get a genuinely useful, free alternative to commercial SSH clients. You can also try the official demo before installing anything.