Portr 2.1: Self-Host an ngrok Alternative for Your Team with Docker Compose
Portr is an AGPL-licensed, self-hosted tunnel for teams: expose local HTTP, TCP and WebSocket services, inspect traffic, and manage access from your own server. Version 2.1.0 adds Docker Compose label tunnels and stronger WebSocket multiplexing. Here is how to run it with Docker Compose.
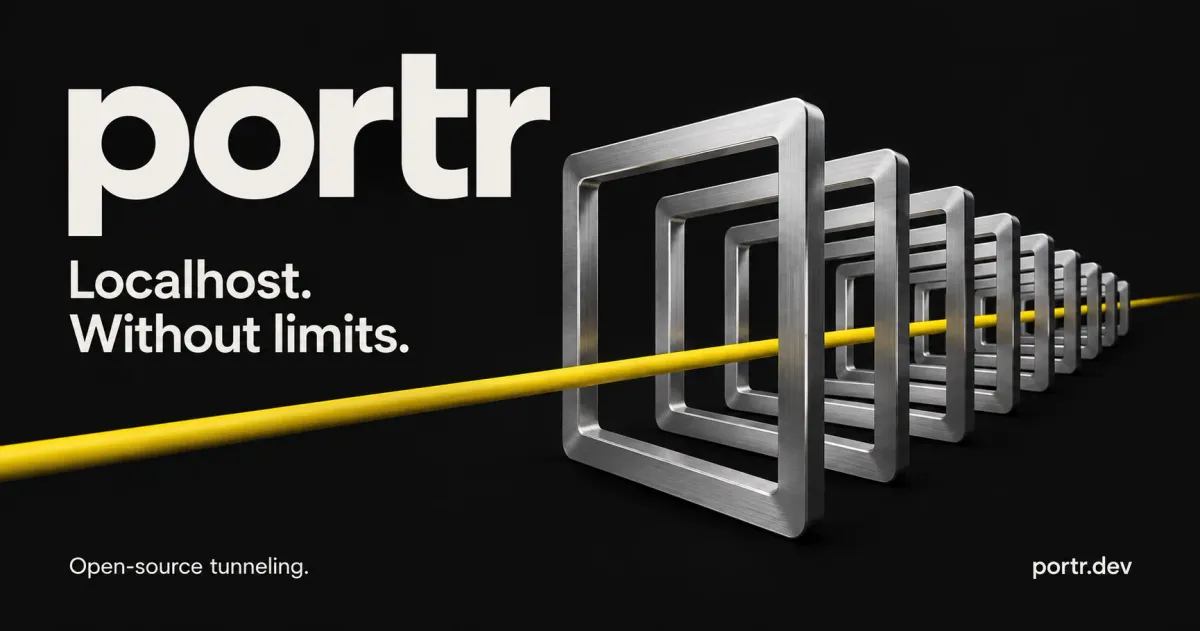
Webhook callbacks, client demos and "can you open that PR preview?" moments all share the same awkward step: something on your laptop needs a public URL. Paid SaaS tunnels are easy until the seat count, bandwidth meter or data-residency question shows up. Homelabs that already run their own reverse proxy often want the same workflow on infrastructure they control.
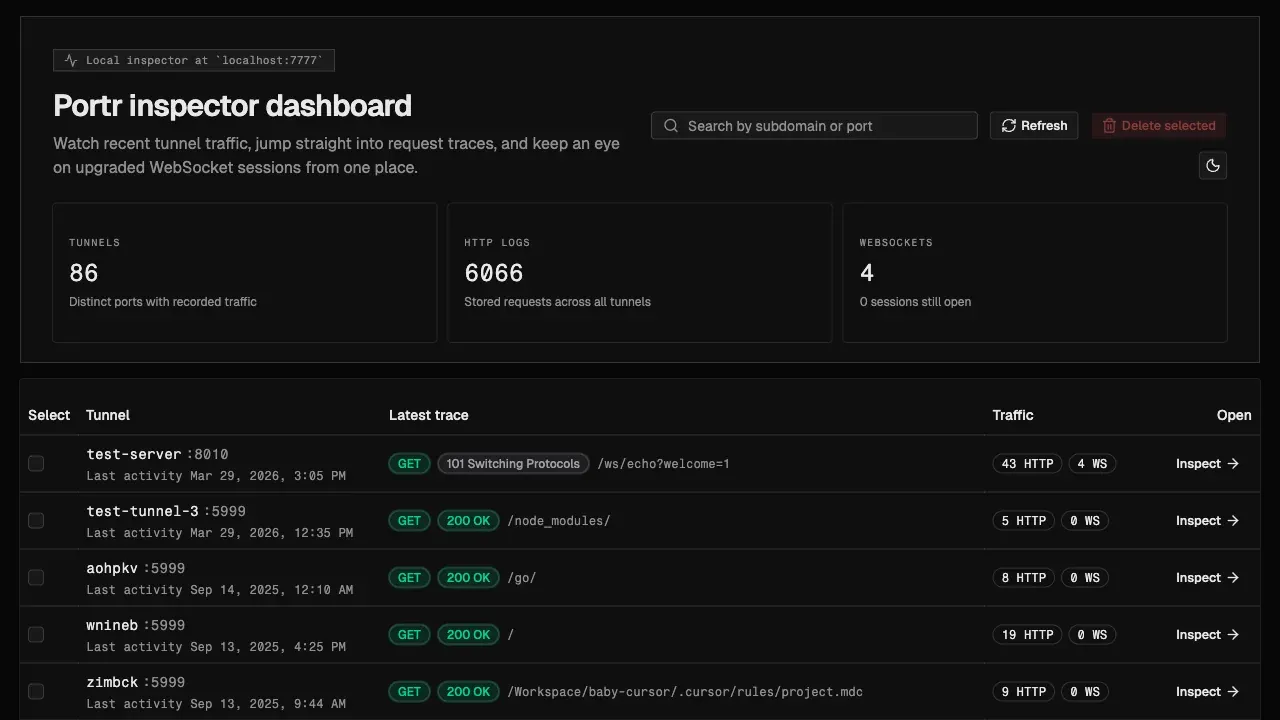
Portr is a self-hosted tunnel built for that niche. It exposes local HTTP, TCP and WebSocket services on public URLs, ships a local request inspector with replay, and gives teams an admin dashboard for users and connections. The latest release, v2.1.0, landed on 1 November 2026 and adds Docker Compose label tunnels plus stronger WebSocket multiplexing. The project is licensed under AGPL-3.0.
In this guide I'll walk through what Portr is, how to deploy the server with Docker Compose, how the client works day to day, and where the honest caveats are.
What is Portr?
Portr is an open-source tunnel solution for small teams. You run a Portr server on a VPS (admin dashboard + tunnel backend + database), install the client CLI on developer machines, then expose a local port with a single command:
portr http 9000
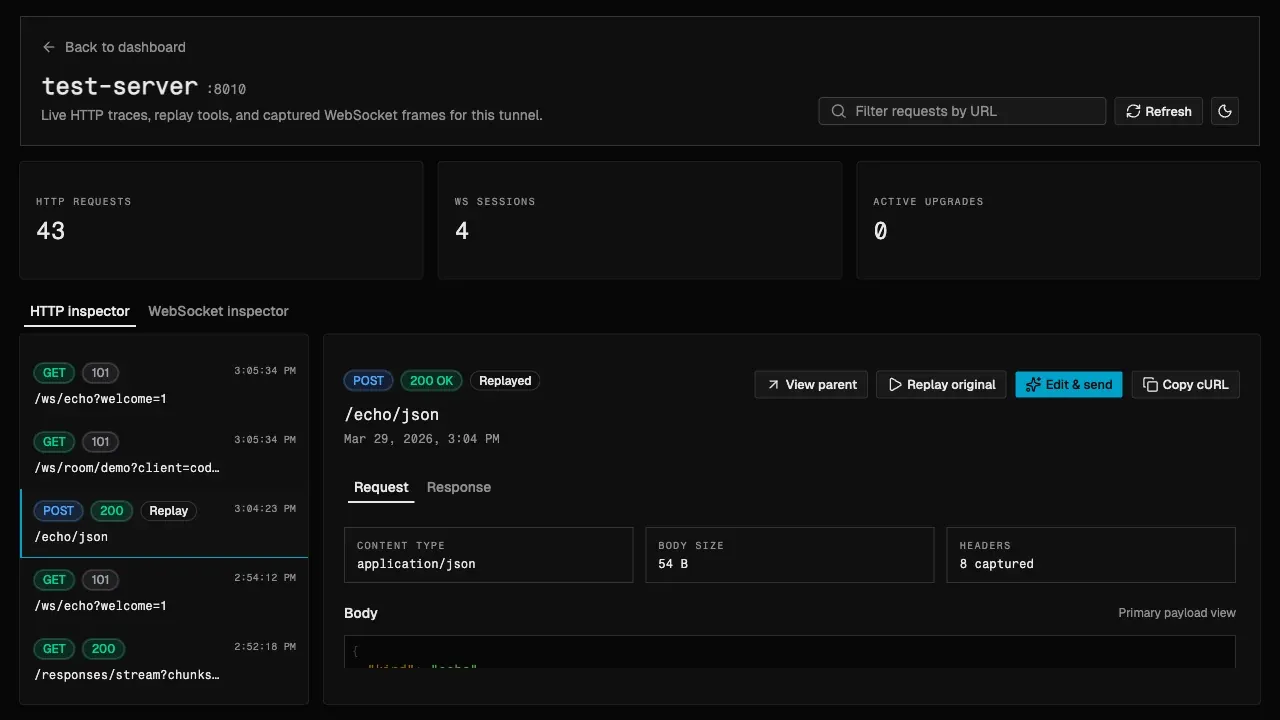
That opens a public HTTPS URL that forwards to localhost:9000, starts a local inspector at http://localhost:7777, and stores request logs under ~/.portr/ so you can query them later with portr logs.
The README is explicit about scope: Portr is aimed at development and team sharing. It is not recommended as the public edge in front of production application servers.
Under the hood the server can speak either SSH or WebSocket as the client-to-server tunnel transport (PORTR_TRANSPORT). Generated client configs follow that choice, so operators pick one transport for the deployment and clients get matching ssh_url or ws_url settings.
Why Portr is interesting right now
Version 2.1.0 (1 Nov 2026) is a meaningful bump for self-hosters and agent-heavy workflows:
portr docker/ Compose labels — add oneamalshaji/portr-clientservice, label app containers withportr.enable=true, and tunnels start and stop with the stack.- WebSocket tunnel improvements — yamux multiplexing, a larger stream window and connection reuse for the WebSocket transport path.
- Connect page in the admin console, plus deployment docs for Fly.io and an IaC-style Railway config.
- Prebuilt images on Docker Hub:
amalshaji/portr:2.1.0(server) andamalshaji/portr-client:2.1.0(client), for bothlinux/amd64andlinux/arm64.
The repository sits around 3.2k stars at the time of writing and remains actively maintained (v2.1.0 assets published 1 Nov 2026).
Key features
Going by the README and official docs:
- HTTP, TCP and WebSocket tunnels to a public URL you control.
- Local inspector on port
7777for request/response inspection, edited replay and WebSocket frame capture. - CLI logs via
portr logs <subdomain>(optional--json), backed by a local SQLite store. - Admin dashboard for teams, users and live connections; first login becomes the superuser.
- Reserved subdomains per team membership (
PORTR_RESERVED_SUBDOMAIN_LIMIT, default 3;0disables new reservations). - Optional GitHub OAuth for the admin UI.
- Basic auth on HTTP tunnels (
--basic-auth/PORTR_BASIC_AUTH/ per-tunnel config). - Host-header rewrite for frameworks with allowlists (Rails, Django, Vite).
- Docker Compose label tunnels with
amalshaji/portr-client(new in 2.1). - SSH or WebSocket transport selected server-side and mirrored into client configs.
Installing the Portr server with Docker Compose
Official production setup uses three services from docker-compose.prod.yaml:
- caddy —
ghcr.io/amalshaji/caddy-docker-proxy:mainfor routing and DNS-01 TLS (Cloudflare token) - server — the combined admin + tunnel process (
command: ["start", "all"]) - postgres —
postgres:16.2
All three use network_mode: "host" in that file. The upstream file builds the server from the repo Dockerfile. For a pinned, pull-based deploy you can swap the build: block for the published image amalshaji/portr:2.1.0 (verified on Docker Hub for this article). If you already run Traefik, Caddy or nginx, skip the bundled Caddy service and terminate TLS yourself — Portr listens on plain HTTP/TCP behind the proxy.
DNS and ports first
Point your domain at the server (use example.com below as a stand-in):
| Type | Name | Value |
|---|---|---|
| A | @ |
your server IPv4 |
| A | * |
your server IPv4 |
Do not orange-cloud those records through a proxied CDN if you use SSH transport: clients need raw TCP to port 2222.
| Port | Purpose |
|---|---|
| 8000 | Admin dashboard + API (/api/v1/healthcheck) |
| 8001 | Tunnel HTTP proxy (and WebSocket tunnel endpoint when PORTR_TRANSPORT=websocket) |
| 2222 | SSH tunnel ingress when PORTR_TRANSPORT=ssh |
| 30001–40001 | Public TCP tunnel range (only if you use TCP tunnels) |
| 20000–30000 | Internal HTTP tunnel ports — firewall these off the public internet |
Step 1: Project folder and env file
mkdir -p ~/portr/data && cd ~/portr
# data/ must be writable by the non-root server container user
Create .env based on the upstream template (host networking means Postgres is reached at localhost, not a Compose DNS name):
PORTR_DOMAIN=example.com
PORTR_DB_URL=postgres://postgres:CHANGE_ME_STRONG@localhost:5432/postgres

PORTR_SERVER_URL=https://example.com
PORTR_TRANSPORT=ssh
PORTR_SSH_URL=example.com:2222
PORTR_SSH_PORT=2222
PORTR_SSH_HOST_KEY=
PORTR_WS_URL=tunnel.example.com
PORTR_ADMIN_PORT=8000
PORTR_PROXY_PORT=8001
PORTR_AUTO_MIGRATE=true
PORTR_RESERVED_SUBDOMAIN_LIMIT=3

PORTR_ADMIN_GITHUB_CLIENT_ID=
PORTR_ADMIN_GITHUB_CLIENT_SECRET=

CLOUDFLARE_API_TOKEN=

POSTGRES_USER=postgres
POSTGRES_PASSWORD=CHANGE_ME_STRONG
POSTGRES_DB=postgres
Generate a stable SSH host key (required for clients that verify host keys across restarts):
ssh-keygen -t ed25519 -f /tmp/portr_host_key -N ""
# Put the PEM private key into PORTR_SSH_HOST_KEY in .env (multi-line secret / Docker secret)
rm /tmp/portr_host_key /tmp/portr_host_key.pub
You can also run portrd generate-host-key from a Portr server binary/image when you prefer the project helper.
Step 2: docker-compose.yml (published image + bundled Caddy)
services:
  caddy:
    image: ghcr.io/amalshaji/caddy-docker-proxy:main
    volumes:
      - /var/run/docker.sock:/var/run/docker.sock
      - caddy_data:/data
    restart: unless-stopped
    network_mode: "host"

  server:
    image: amalshaji/portr:2.1.0
    command: ["start", "all"]
    network_mode: "host"
    env_file: .env
    restart: unless-stopped
    depends_on:
      postgres:
        condition: service_healthy
    healthcheck:
      test: ["CMD-SHELL", "curl -f http://localhost:8000/api/v1/healthcheck || exit 1"]
      interval: 30s
      timeout: 10s
      retries: 3
      start_period: 40s
    volumes:
      - ./data:/app/data
    labels:
      caddy_0: $PORTR_DOMAIN
      caddy_0.reverse_proxy: "{{upstreams http 8000}}"
      caddy_0.encode: gzip
      caddy_1: "*.$PORTR_DOMAIN"
      caddy_1.reverse_proxy: "{{upstreams http 8001}}"
      caddy_1.tls.dns: "cloudflare $CLOUDFLARE_API_TOKEN"
      caddy_1.encode: gzip

  postgres:
    image: postgres:16.2
    network_mode: "host"
    environment:
      POSTGRES_USER: $POSTGRES_USER
      POSTGRES_PASSWORD: $POSTGRES_PASSWORD
      POSTGRES_DB: $POSTGRES_DB
    volumes:
      - postgres_data:/var/lib/postgresql/data
    restart: unless-stopped
    healthcheck:
      test: ["CMD-SHELL", "pg_isready -U $POSTGRES_USER"]
      interval: 10s
      timeout: 5s
      retries: 5

volumes:
  postgres_data: {}
  caddy_data: {}
Notes:
- Prefer cloning the repo and using upstream
docker-compose.prod.yamlwithbuild:if you want an exact match to the docs path. - Drop the
caddyservice, labels andCLOUDFLARE_API_TOKENwhen you terminate TLS yourself. Pointexample.com→localhost:8000and*.example.com→localhost:8001, forwardHostverbatim, pass WebSocket upgrades, and avoid response buffering on the wildcard vhost (custom reverse proxy guide). - Certificates must cover both the apex and the wildcard. Session cookies are
Secure, so the admin UI must be served over HTTPS.
Step 3: Start and open the admin UI
docker compose up -d
docker compose ps
curl -fsS https://example.com/api/v1/healthcheck
Visit https://example.com. The first successful login is treated as the superuser. From the overview page, copy the client setup command.
Client: install, auth, tunnel
Install on macOS/Linux/Windows:
curl -sSf https://install.portr.dev | sh
# or: brew install amalshaji/taps/portr
# or download the v2.1.0 zip for your OS from GitHub Releases
Authenticate with the token from the dashboard:
portr auth set --token YOUR_TOKEN --remote example.com
That writes ~/.portr/config.yaml with server_url, transport settings and your secret. Then:
portr http 9000
portr http 9000 --subdomain demo
portr http 9000 --host-header rewrite
portr http 9000 --basic-auth admin:s3cret
Inspector: http://localhost:7777. Logs:
portr logs demo
portr logs demo /api/ --json
Docker Compose label tunnels (2.1)
For a local stack, add the client sidecar (mount the config created by portr auth set):
services:
  portr:
    image: amalshaji/portr-client:2.1.0
    volumes:
      - ~/.portr/config.yaml:/root/.portr/config.yaml:ro
      - /var/run/docker.sock:/var/run/docker.sock
    ports:
      - "7777:7777"

  web:
    build: .
    labels:
      portr.enable: "true"
      portr.subdomain: my-app
      portr.port: "3000"
Only containers in the same Compose project with portr.enable=true are tunnelled. Mounting the Docker socket is powerful — keep this pattern on developer machines, not on shared production hosts. Set an explicit portr.subdomain (for example ${USER}-app) so two people running the same project against one server do not collide.
Config tips for a safer setup
- Pin image tags (
amalshaji/portr:2.1.0) instead of floatinglatest. - Persist
PORTR_SSH_HOST_KEYso clients do not see a new host key after every recreate. - Firewall ports
20000–30000and keep Postgres / 8000 / 8001 off the public internet when a reverse proxy terminates TLS on 443. - Basic auth on sensitive demo tunnels; remember it is base64 over the wire and only safe because the public URL is HTTPS by default.
- Watch the VPS with something you already trust — for example Uptime Kuma on
https://example.com/api/v1/healthcheck, and push failures through ntfy or Gotify. - Pair webhook testing with changedetection.io when you care about upstream content changes, not just inbound callbacks.
Limitations to keep in mind
- Dev/team tool, not a production CDN. The maintainers say so up front. Put real production apps behind a proper reverse proxy and deployment pipeline.
- DNS and TLS complexity. You need an apex + wildcard, working certificates, and (for SSH transport) an open TCP 2222 that is not hidden behind a proxied CDN.
- Host networking in the official compose file simplifies port binding but is a different operational model than a bridged Compose stack. Plan firewall rules accordingly.
- AGPL-3.0. Fine for most self-hosters; if you modify and offer Portr as a network service, read the licence obligations carefully.
- Basic auth caveats. CORS preflights without
Authorizationfail; browser credential caching has no logout; inspector replay needs the header set explicitly after redaction. - Young-ish surface for agent tooling. Compose label tunnels and WebSocket multiplexing are new in 2.1 — pin versions and smoke-test your path (HTTP webhook vs TCP vs WS).
Portr vs common alternatives (short, verified)
| Portr 2.1 | Cloudflare Tunnel (cloudflared) |
frp | |
|---|---|---|---|
| Licence | AGPL-3.0 | Cloudflare ToS / client Apache-2.0 | Apache-2.0 |
| Who runs the edge | You (self-hosted server) | Cloudflare network | You (frps) |
| Team admin UI | Built-in dashboard | Cloudflare Zero Trust dashboards | Limited / external |
| Local request inspector + replay | Yes (:7777) |
Not the same local inspector UX | No first-class inspector |
| Best fit | Small teams that want an ngrok-like DX on their VPS | Users already on Cloudflare who want outbound-only connectors | Operators who want a minimal, battle-tested reverse proxy tunnel |
Paid ngrok remains the path of least resistance if you do not want to operate DNS, TLS and a tunnel server. Portr's pitch is control: your domain, your audit trail, your team roster.
Conclusion
Portr is a practical answer when "just use ngrok" stops being comfortable — shared team tunnels, reserved subdomains, a real admin UI and a local inspector that makes webhook debugging less painful. v2.1.0 makes the Docker Compose day-to-day nicer with label-driven tunnels and hardens the WebSocket transport path.
Deploy the server with Compose (published amalshaji/portr:2.1.0 or an upstream source build), put HTTPS in front, install the client, and keep the scope honest: development and demos, not your production front door. Used that way, it slots cleanly next to the rest of a homelab monitoring and notification stack.
Are you still on a SaaS tunnel for webhooks, or have you already moved that edge onto your own VPS? Let me know what worked.
Sources
- Portr on GitHub (README, features, licence)
- Portr v2.1.0 release notes
- Portr documentation
- Server deployment (Docker Compose)
- Custom reverse proxy
- Client installation
- HTTP tunnel guide
- Docker Compose label tunnels
- Official production compose file
- Docker Hub: amalshaji/portr
- Docker Hub: amalshaji/portr-client
- Admin UI screenshots in the repository