Coolify 4.7: Self-Host Your Own Vercel and Heroku Alternative with Docker
Coolify is an Apache-2.0 licensed, self-hostable alternative to Heroku, Netlify and Vercel. Version 4.7 adds on-server image vulnerability scanning, SFTP/FTPS/WebDAV backups, SSH key rotation and Forgejo support. Here's what it does and how to install it with Docker Compose.
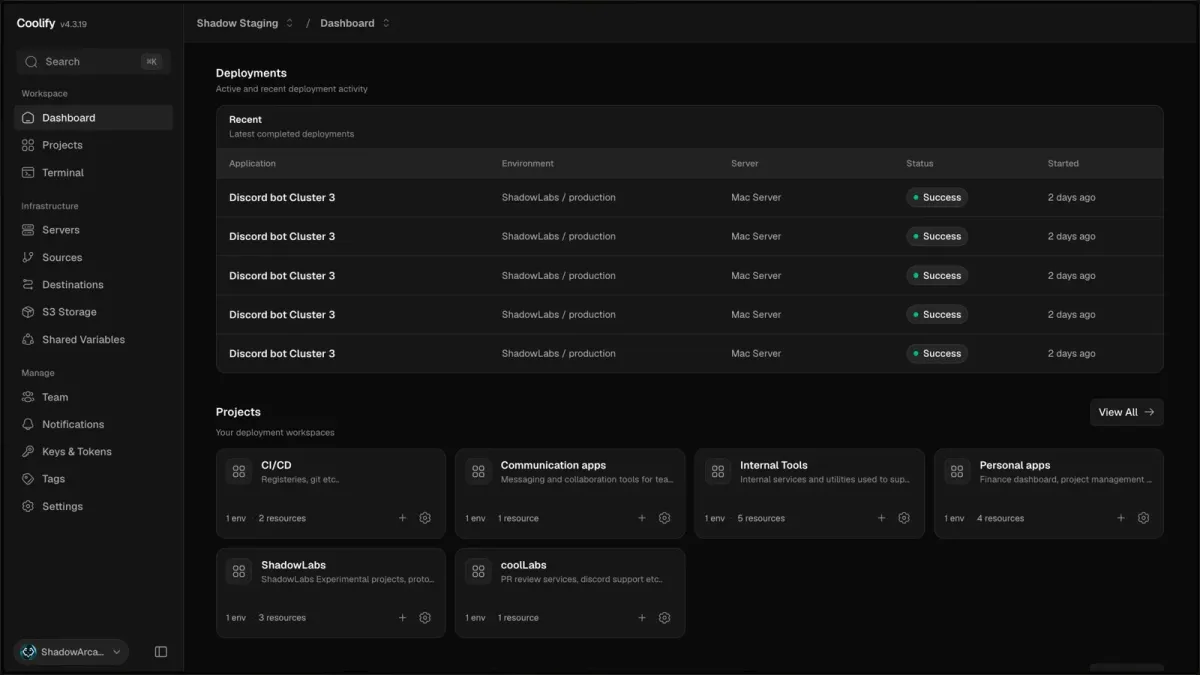
Sooner or later every homelab hits the same wall: you have a server (or three), a couple of Git repositories and a growing list of Compose files, and every new app means another round of reverse proxy config, TLS certificates, environment variables and backup scripts. Cloud platforms like Heroku, Netlify or Vercel make that part effortless, but your code and data end up on someone else's infrastructure.
Coolify tries to give you that "push to deploy" comfort on hardware you own. It is one of the most-starred self-hosting projects on GitHub (more than 66,000 stars at the time of writing), and its team shipped a big 4.7.0 release on 9 November 2026, followed by five smaller follow-up releases up to v4.7.5 on 10 November. Time to take a proper look.
What is Coolify?
Coolify is an open-source, self-hostable platform for deploying applications, databases and services on your own servers. The project calls itself an alternative to Heroku, Netlify and Vercel, and it is licensed under the Apache License 2.0. According to the README there is no paywall: the self-hosted version is free, and the team funds development through sponsors and a paid hosted option called Coolify Cloud.
The idea is simple: you install Coolify on one Linux server, and it manages that server and any other machines it can reach over SSH. That can be a VPS, a dedicated server, a VM in your homelab, an old laptop or a 64-bit Raspberry Pi. One detail we like: the README states that your configurations stay on your servers, and that your running resources keep working if you stop using Coolify.
Key features
Based on the official README and docs, Coolify covers:
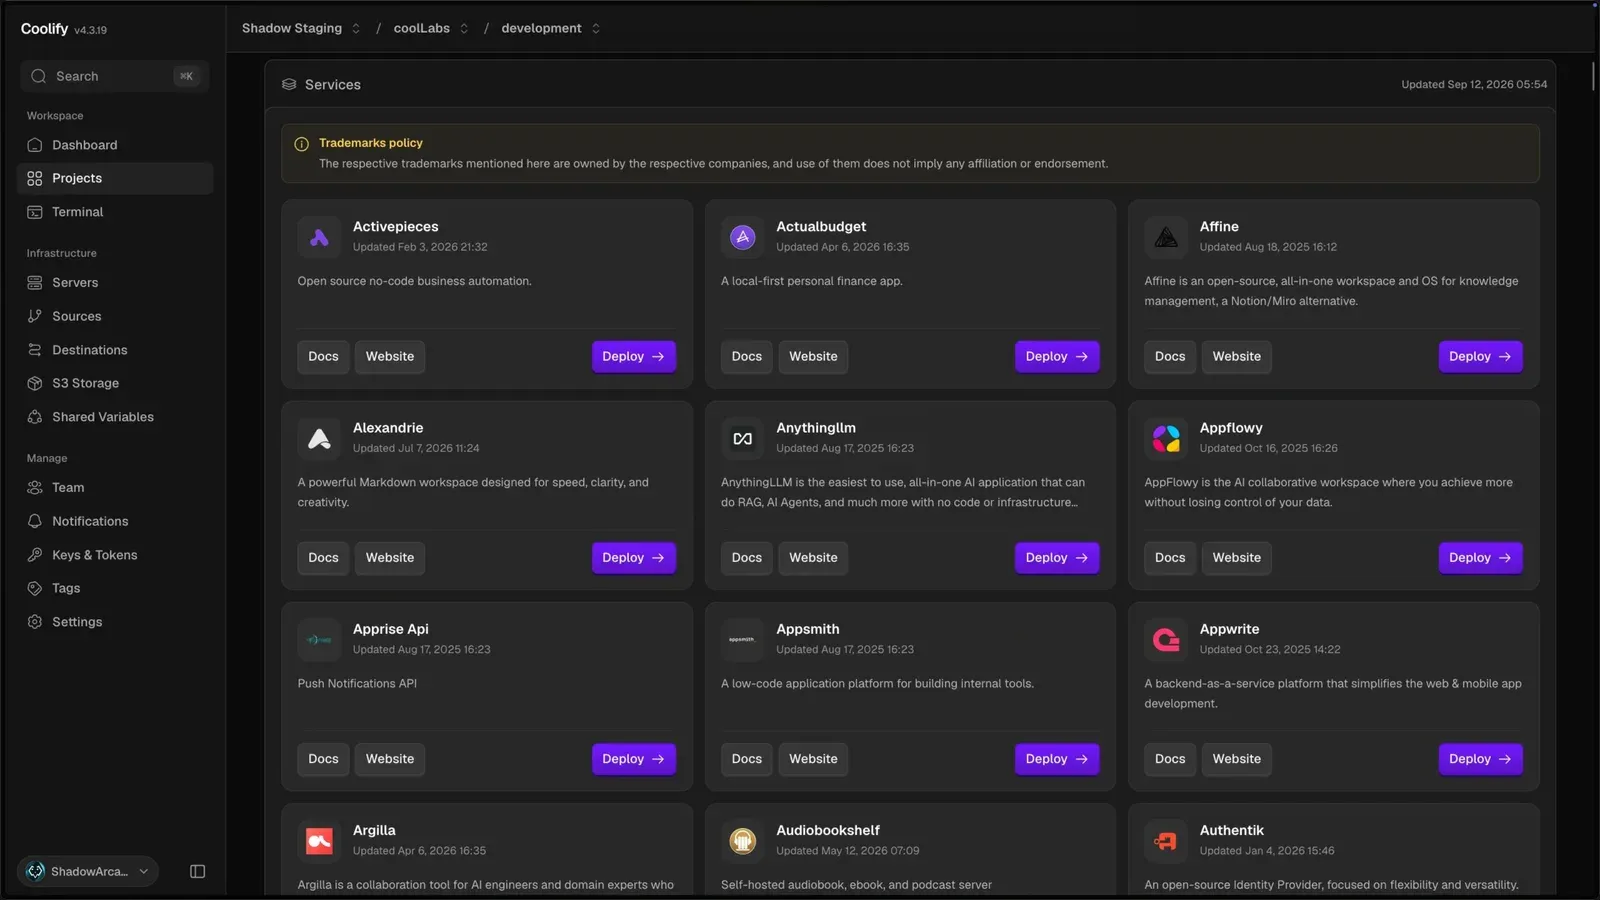
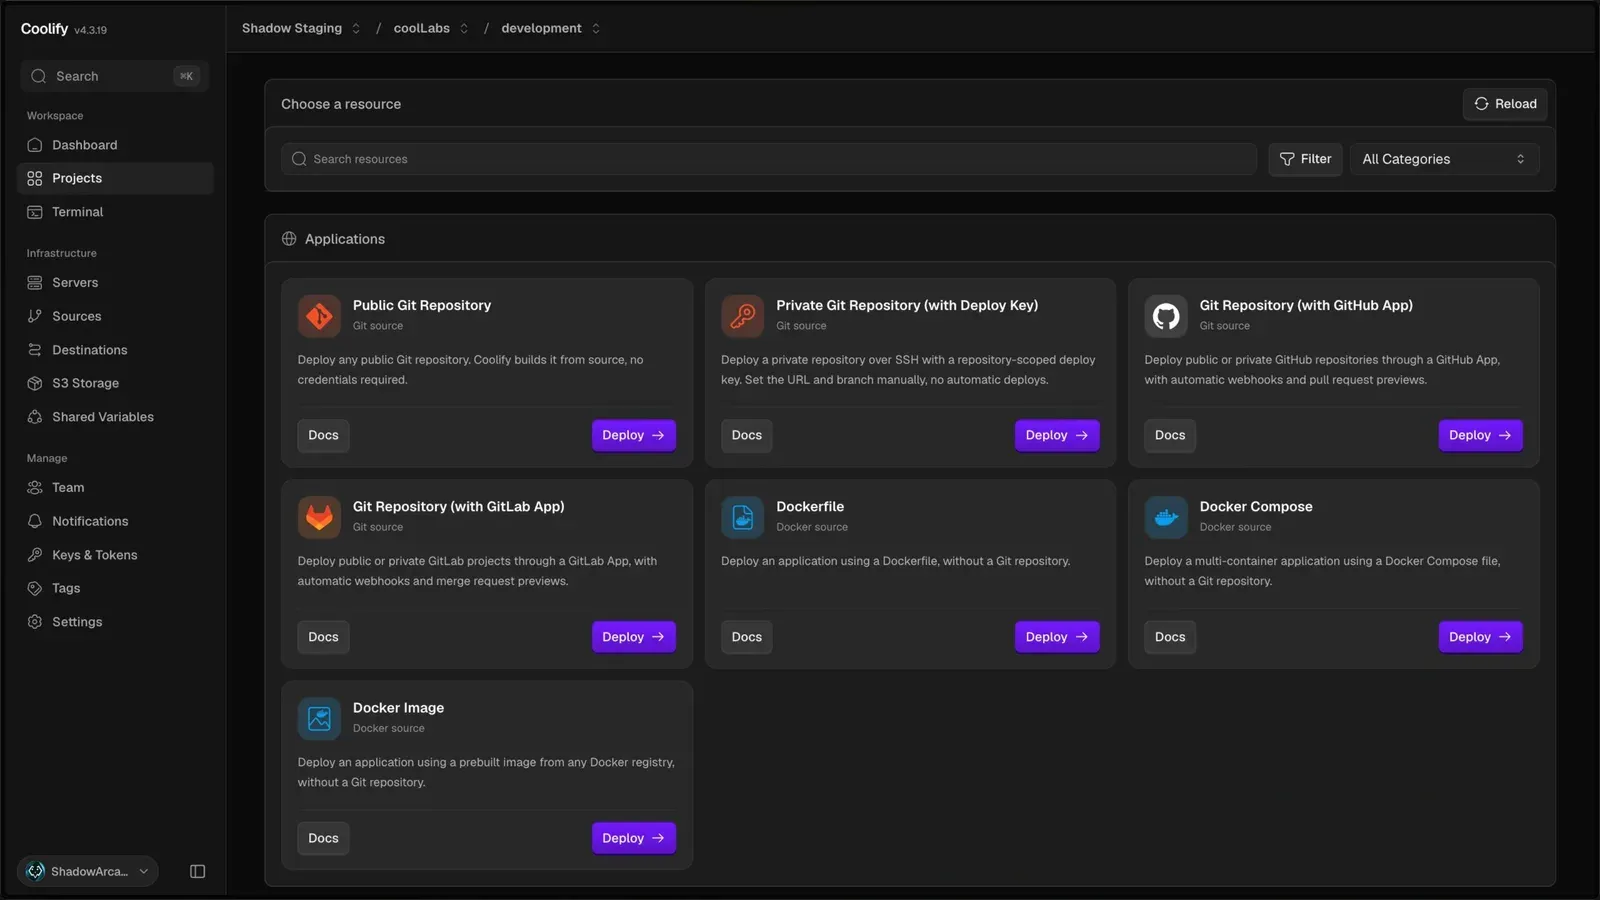
- Deploy almost anything: build from GitHub, GitLab, Bitbucket or Gitea with Nixpacks, Railpack, a Dockerfile, Docker Compose, or simply run a prebuilt Docker image.
- Databases and 360+ one-click services: managed databases and a large catalogue of service templates with persistent storage and generated credentials. Several apps we've reviewed on this blog, like Apprise API and Alexandrie, show up in the catalogue.
- Git-driven deployments: deploy on every push, create pull-request preview environments, trigger deployments by webhook, and roll back to retained images.
- Networking done for you: custom domains, automatic HTTPS certificates through the built-in proxy (Traefik or Caddy), health checks and container networks.
- Multi-server management: connect several servers, read deployment and runtime logs, and open container terminals from the browser.
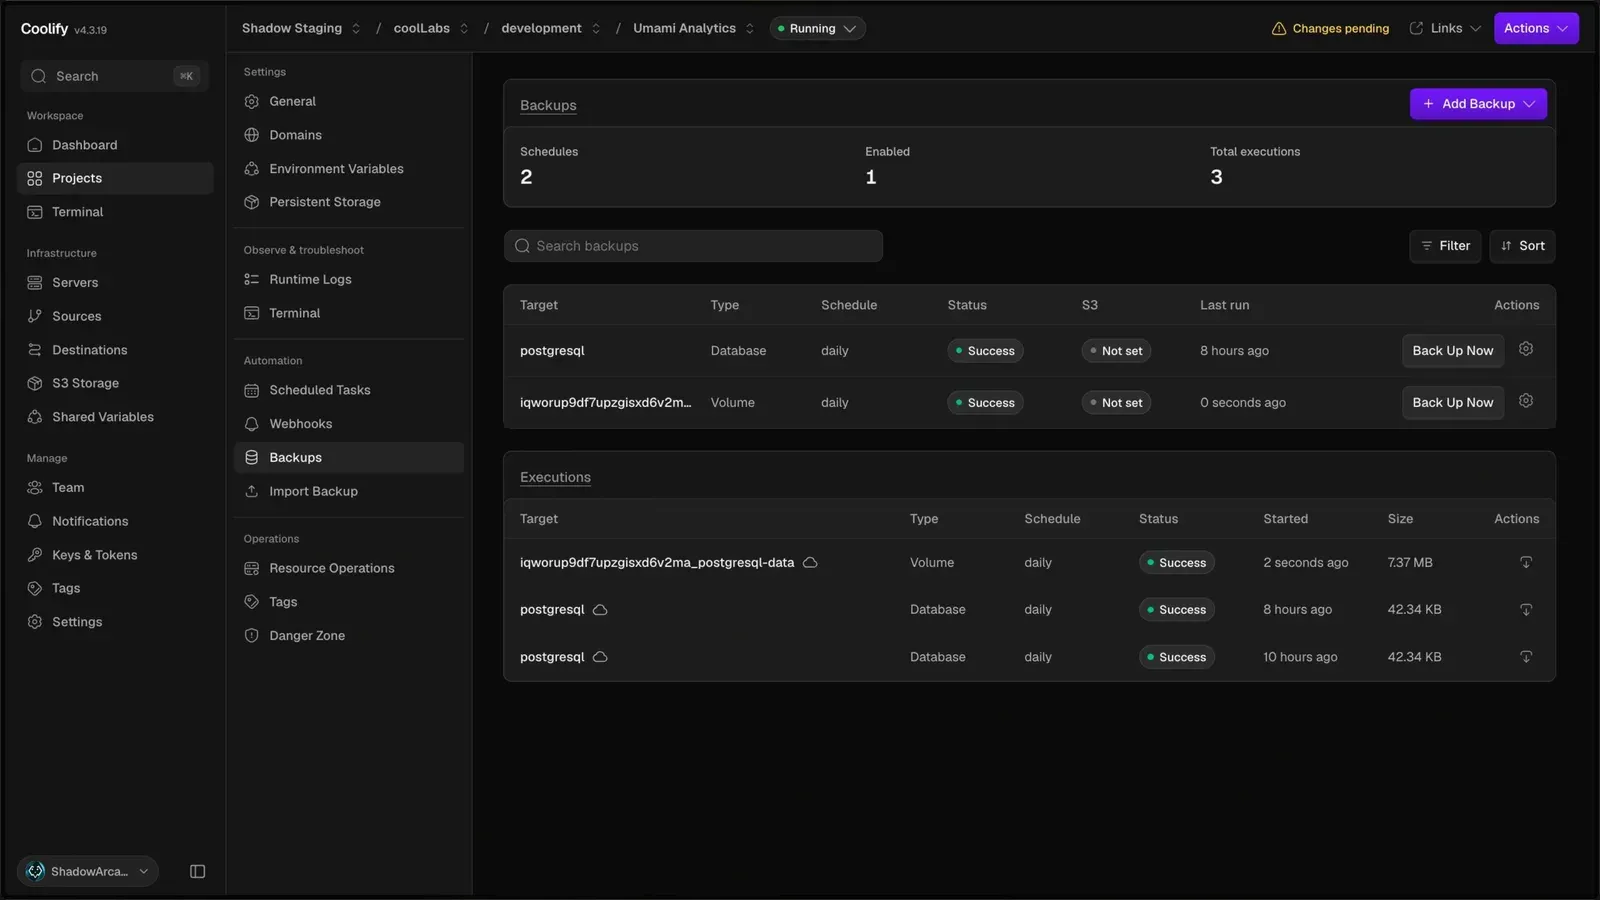
- Backups and automation: database and storage backups, scheduled tasks, environment variables, secrets and notifications.
- API, CLI and MCP: besides the dashboard, you can manage resources via an API, a CLI and an MCP server for AI clients, with team-based access control.
What's new in Coolify 4.7
The v4.7.0 release notes are long, so here are the highlights for self-hosters:
- Container image vulnerability scanning (opt-in). Coolify can scan the images of your applications, databases and services with Syft and Grype. The scanners run on your own server, and the docs state that images and their package lists are not sent to a third party. Each resource gets a security status and version recommendations, and you can optionally block a deploy when a new image has problems. It is off by default and enabled per server.
- More backup targets. Besides S3, database and volume backups can now go to SFTP, FTPS and WebDAV storages, including downloads, retention and restores. S3 storages also get a "Skip TLS certificate verification" option for endpoints with a self-signed or private CA.
- SSH hardening. New keys are generated as Ed25519, a "Rotate key" action replaces a key on all servers that use it, and Coolify pins a server's SSH host key on first connection and notifies the team if it changes.
- Forgejo and Codeberg are now supported in the Gitea App source.
- Valkey becomes an image option for the Redis database type, and new databases default to newer versions such as PostgreSQL 18 (existing databases keep their image).
- Calmer notifications. Scheduled jobs that keep failing notify on the first failure and then at most once a day, plus one "works again" message when they recover.
There are also breaking changes worth reading before you update: by default, older queued webhook deployments of an application are now cancelled when a newer push arrives, the cloud provider token API is limited to team admins and owners, and Resend email settings moved to new fields. The follow-up releases 4.7.1 to 4.7.5 are mostly fixes (4.7.3 also adds CSV/JSON/Markdown export of vulnerability lists); 4.7.2 fixed a bug where the root account setup window closed right after a fresh install, so if you install now, you get the fixed version.
Why use Coolify?
- One place for all your apps. Instead of a folder full of Compose files and hand-written proxy rules, you get projects, environments and a dashboard.
- Git push to deploy at home. Pull-request previews and automatic deployments are features you'd normally pay a cloud platform for.
- Backups are built in. Database backups with schedules and history are part of the product, not an afterthought.
- No lock-in. It's Apache-2.0, your configs live on your servers, and running resources keep working without Coolify.
Requirements
According to the self-hosted installation guide, Coolify needs:
| Item | Minimum |
|---|---|
| CPU | 2 cores |
| Memory | 2 GB RAM |
| Disk | 10 GB free space |
| Architecture | amd64 or arm64 |
| OS | Linux (Debian, Ubuntu LTS, RHEL family, SUSE, Arch, Alpine, Raspberry Pi OS 64-bit) |
The docs recommend a fresh server to avoid conflicts with existing applications. That is important for homelabs: Coolify brings its own reverse proxy that wants ports 80 and 443, so don't install it on a box that already runs another proxy.
Installation
Option 1: The install script (recommended by the Coolify team)
On a fresh server, as root, run:
curl -fsSL https://cdn.coollabs.io/coolify/install.sh | bash
The script installs the required packages and Docker Engine (where supported), creates the directory structure under /data/coolify, sets up SSH keys so Coolify can manage the server, and starts Coolify. As always with curl | bash, you can read the install script first.
Option 2: Manual installation with Docker Compose
If you prefer control over every step, or Docker Engine 24+ is already installed, the docs describe a manual install. Coolify's stack consists of the coollabsio/coolify image plus PostgreSQL and Redis, defined in two official Compose files.
1. Create the directories:
mkdir -p /data/coolify/{source,ssh,applications,databases,backups,services,proxy,webhooks-during-maintenance}
mkdir -p /data/coolify/ssh/{keys,mux}
mkdir -p /data/coolify/proxy/dynamic
2. Create the SSH key Coolify uses to manage this host and authorize it:
ssh-keygen -f /data/coolify/ssh/keys/id.root@host.docker.internal -t ed25519 -N '' -C root@coolify
cat /data/coolify/ssh/keys/id.root@host.docker.internal.pub >> ~/.ssh/authorized_keys
chmod 600 ~/.ssh/authorized_keys
3. Download the official files:
curl -fsSL https://cdn.coollabs.io/coolify/docker-compose.yml -o /data/coolify/source/docker-compose.yml
curl -fsSL https://cdn.coollabs.io/coolify/docker-compose.prod.yml -o /data/coolify/source/docker-compose.prod.yml
curl -fsSL https://cdn.coollabs.io/coolify/.env.production -o /data/coolify/source/.env
curl -fsSL https://cdn.coollabs.io/coolify/upgrade.sh -o /data/coolify/source/upgrade.sh
4. Set permissions:
chown -R 9999:root /data/coolify
chmod -R 700 /data/coolify
5. Generate secrets (only on the very first install – changing them later can break your instance):
sed -i "s|APP_ID=.*|APP_ID=$(openssl rand -hex 16)|g" /data/coolify/source/.env
sed -i "s|APP_KEY=.*|APP_KEY=base64:$(openssl rand -base64 32)|g" /data/coolify/source/.env
sed -i "s|DB_PASSWORD=.*|DB_PASSWORD=$(openssl rand -base64 32)|g" /data/coolify/source/.env
sed -i "s|REDIS_PASSWORD=.*|REDIS_PASSWORD=$(openssl rand -base64 32)|g" /data/coolify/source/.env
sed -i "s|PUSHER_APP_ID=.*|PUSHER_APP_ID=$(openssl rand -hex 32)|g" /data/coolify/source/.env
sed -i "s|PUSHER_APP_KEY=.*|PUSHER_APP_KEY=$(openssl rand -hex 32)|g" /data/coolify/source/.env
sed -i "s|PUSHER_APP_SECRET=.*|PUSHER_APP_SECRET=$(openssl rand -hex 32)|g" /data/coolify/source/.env
6. Create the Docker network and start Coolify:
docker network create --attachable coolify
docker compose --env-file /data/coolify/source/.env \
  -f /data/coolify/source/docker-compose.yml \
  -f /data/coolify/source/docker-compose.prod.yml \
  up -d --pull always --remove-orphans --force-recreate
First login – do this immediately
Open http://<your-server-ip>:8000 and create your admin account right away. The docs are very clear about why: whoever reaches the registration page first becomes the instance admin and effectively gets root access to the server. Coolify only accepts the first account within 10 minutes after it starts; if you see "Setup window closed", run docker restart coolify and reload.
Then back up /data/coolify/source/.env somewhere safe. It contains the APP_KEY that encrypts values in Coolify's database, and you need it to restore a backup.
Configuration tips
- Firewall ports. On the Coolify server, the firewall docs list
8000/tcp(dashboard),6001/tcp(real-time updates),6002/tcp(web terminal),22/tcp(SSH), and80/443/tcpfor the proxy. Once the dashboard works through a domain such ascoolify.example.com, you can close public access to 8000, 6001 and 6002. Remote servers managed by Coolify only need SSH (ideally restricted to your Coolify server's IP) plus 80/443 if they serve public web traffic. - Don't trust plain UFW. The docs warn that Docker-published ports can bypass UFW rules. Use your hosting provider's firewall, or the community tool ufw-docker.
- Use a separate server for workloads. The README recommends one server for Coolify and one or more servers for your deployed resources. Builds on the Coolify host itself can make a small server unresponsive.
- Configure instance backups before updating. In Settings > Backup, set up the instance backup; with "Backup before update" enabled (the default), Coolify backs up its database before dashboard-triggered and automatic updates.
- Pick your update channel consciously. Automatic updates and the Stable/Nightly channels live under Settings > Updates. For a homelab, Stable plus a quick look at the release notes is the safe choice.
- Try image scanning on one server first. It needs about 1.2 GB of disk for scanner data and uses up to 1 CPU and 1 GB RAM while scanning, according to the image scanning docs.
- Wire up notifications. Coolify ships notification channels for email, Discord, Slack/Mattermost, Telegram, Pushover and generic webhooks, so failed deployments and backups don't go unnoticed. For the apps you deploy, keep an independent external check such as Uptime Kuma – if the Coolify host itself goes down, it can't warn you.
Limitations
- It wants the whole server. Coolify runs its own proxy and expects a fresh machine. Migrating an existing hand-built Docker host into Coolify is not a one-click job.
- The admin account is root on your servers. Coolify manages servers over SSH as root (or a sudo user), so the dashboard is a high-value target. Use strong credentials, keep it updated and don't expose it more than necessary.
- Lots of moving parts. The 4.7.0 changelog alone is huge, and it contains breaking changes. Read release notes before updating, and keep backups of
/data/coolify/source/.env. - Linux only. You can only run it on Linux; Raspberry Pi needs a 64-bit OS.
- Instance backups don't cover your apps. The uninstall docs point out that an instance backup contains Coolify's database, not the applications, databases or volumes you deploy. Set up resource backups separately.
- Screenshots may lag behind. The official product screenshots we use here show an earlier 4.x build, so details of the UI may differ in 4.7.
Self-hosted vs. Coolify Cloud
| Self-hosted | Coolify Cloud | |
|---|---|---|
| Who runs the Coolify instance | You | The Coolify team |
| Cost | Free and open source | Paid service |
| Your servers | Connected via SSH | Connected via SSH |
| Maintenance | You update and back up Coolify | High availability and less maintenance |
In both cases, your apps run on your own servers. If you already use something like Beszel or PatchMon for monitoring and patching, Coolify complements them: it is a deployment platform, not a monitoring tool. And if your Git lives at home in Gitea or Forgejo, Coolify 4.7 can now connect to both.
Conclusion
Coolify is the closest thing to a private Heroku you can install with one command, and 4.7 shows a project that is maturing: on-server vulnerability scanning, more backup targets and a lot of SSH and API hardening. Give it a dedicated server, create your admin account immediately, back up the .env file and read the release notes before each update – and you get Git-push deployments, previews and one-click services without handing your stack to a cloud provider. More tools in this space are collected under our Server Management tag.
Sources
- Coolify repository and README: github.com/coollabsio/coolify
- Coolify v4.7.0 release notes: github.com/coollabsio/coolify/releases/tag/v4.7.0
- Coolify v4.7.5 (latest stable at the time of writing): github.com/coollabsio/coolify/releases/tag/v4.7.5
- Self-hosted installation guide: coolify.io/docs/start-with-self-hosted
- Firewall ports: coolify.io/docs/core/infrastructure/servers/firewall
- Image scanning: coolify.io/docs/core/security/image-scanning
- Updating Coolify: coolify.io/docs/core/instance-management/update
- Uninstalling and backups: coolify.io/docs/core/instance-management/uninstallation
- Docker Hub: hub.docker.com/r/coollabsio/coolify
- Screenshots: coollabsio/coolify-docs (Apache-2.0), also shown on coolify.io/docs/screenshots